Metal roofs are durable, sleek, and resistant to the elements, but when it comes to energy efficiency and retrofitting options, the gaps between ribs (flutes) can pose a challenge. That’s where flute fill comes in as a smart solution that improves insulation and creates a stable substrate for additional layers. Here’s a step-by-step look at how a flute fill retrofit over existing metal roofing can enhance performance without removing the original panels.
What Is Flute Fill?
Flute fill is typically a rigid insulation board—often EPS, XPS, or polyiso—cut to fit the valleys of a ribbed metal roof. By filling these flutes, you create a level surface for installing another roofing system, like a single-ply membrane or even additional insulation and cover board.

Benefits of a Flute Fill Retrofit
Here are the benefits of having a flute fill. Have a look:
- Improved Thermal Performance:
Flute fill improves energy efficiency by reducing heat loss through the roof. It eliminates open-air cavities between the metal ribs, which are the main causes of air escape, leading to high energy bills. high energy bills. Additionally, the retrofit increases the R-value of the roof.
- Cost-Effective: Eliminates the need to remove existing panels.
Another amazing benefit of the flute fill retrofit is that it is pocket-friendly. Unlike other roofing solutions, it is applied to the existing metal roof. In this way, it reduces the labor cost, as you don’t have to tear off the roof.
- Structural Enhancement: Creates a solid base for further layering.
Flute fill serves as an added layer of security for the existing roof due to its pressure and water-resistant qualities. It creates a flat yet solid surface that supports new roofing materials. Additionally, it distributes the weight evenly and does not put extra pressure on the weak parts of the roof.
- Sustainability: Reduces landfill waste from tear-offs.
Considering the rising concerns related to sustainability, flute fill is the perfect solution. It doesn’t require the roof to be demolished, which means less material and waste end up in the landfills. Additionally, it promotes energy efficiency and cuts emissions due to less energy use.
Installation Process
When it comes to installing a flute fill over a metal roof, it requires careful preparation and layering. Therefore, it is important to perform each step accurately to ensure insulation, durability, and a watertight seal.
- Inspection & Prep
Begin the process with a thorough inspection of the existing metal roof. Look for visible signs of damage such as rust, corrosion, loose fasteners, or warped panels that could compromise the retrofit. It’s essential to clean the entire roof surface and ensure it is dry before installation, as this will help adhesives bond properly and create a secure base for insulation and subsequent roofing layers.
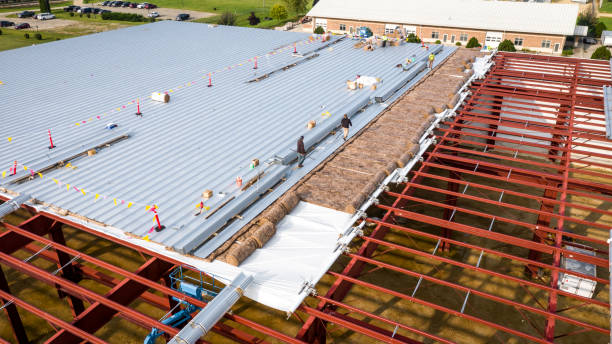
- Flute Fill Placement
After preparing the surface, take precise measurements of the flutes. Accurately cut the insulation boards to match the dimensions of the flutes so they fit snugly into each valley. Proper placement is crucial to eliminate gaps and prevent thermal bridging, ensuring consistent insulation throughout the roof.
- Cover Board Installation
Once the flutes have been filled, the next step is to install a rigid cover board over the entire surface. This cover board unifies the insulation and provides a stable, walkable surface for the final roofing layer. It also protects the insulation below and helps distribute loads more evenly. Proper fastening is critical to avoid compromising the integrity of the system.
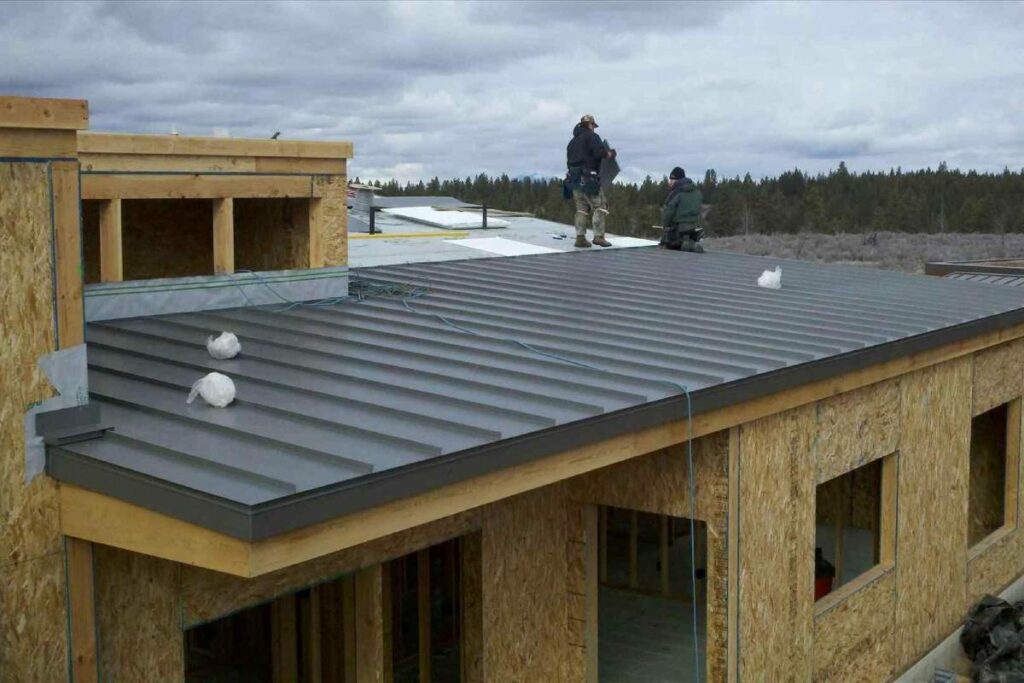
- Final Roof Layer
With the cover board securely installed, you can now apply the final roofing layer. Common choices include single-ply membranes like TPO or PVC, or modified bitumen systems, depending on performance requirements and climate. All seams, edges, and penetrations must be carefully sealed to maintain a watertight barrier and complete the system.
Field Considerations
However, here are some key considerations that you might want to look at:
- Thermal Bridging:
Metal components within a roof system can conduct heat, leading to energy loss. To counteract this, continuous insulation strategies should be applied throughout the roofing layers. Using a flute fill in combination with a cover board creates a uniform insulation layer that reduces thermal transfer.
- Moisture Control:
Moisture management is vital to the success of any roofing retrofit. Trapped condensation or leaks can degrade insulation and lead to mold or structural damage. Installing vapor barriers or venting systems in areas prone to moisture helps protect the integrity of the roof assembly.
- Attachment Points:
All layers of the retrofit system must be securely attached without damaging the original metal roof. Fastener selection and spacing should follow manufacturer guidelines and project specifications. Care must be taken not to overdrive fasteners or penetrate areas that could compromise waterproofing.
Conclusion
In short, a flute fill retrofit is a smart and efficient way to upgrade the performance of an existing metal roof without the need for a complete tear-off. It improves energy efficiency, extends the life of the roof, and provides a solid foundation for additional layers. If you follow the correct installation steps and address key considerations like thermal bridging and moisture control, you can achieve a long-lasting, weather-resistant roofing system. Whether you’re a contractor or a building owner, this retrofit solution offers long-term value, reduced energy costs, and improved comfort.
FAQs
Can a flute fill retrofit be applied over any type of metal roofing?
Yes, flute fill can be installed over most ribbed or corrugated metal roofing systems, provided the existing panels are in good condition.
What type of insulation is best for flute fill?
Polyiso, EPS, and XPS are all suitable, but the best choice depends on your budget, thermal goals, and system requirements.
Do I need a cover board over the flute fill insulation?
Yes, the cover board is essential to create a smooth surface, protect the insulation, and support the final roofing membrane.
How long does it take to install a flute fill retrofit?
Installation time varies by project size, but most flute fill retrofits can be completed within a few days under normal conditions.